I’ve transported this set-up a couple of times up to my sister’s home, 230 miles away. It all goes in 4 or 5 bags that easily stow in the back of my “extended cab” T100 (Toyota pick-up) – along with the rest of my travel gear, including my clothes, laptop bag, and three cat-carriers. The only thing I put in the bed of the truck is the cat-box wrapped in a large garbage bag. I’ve also made a 4-part YouTube series covering this set-up.
The first, and largest item is my Backdrop Stand
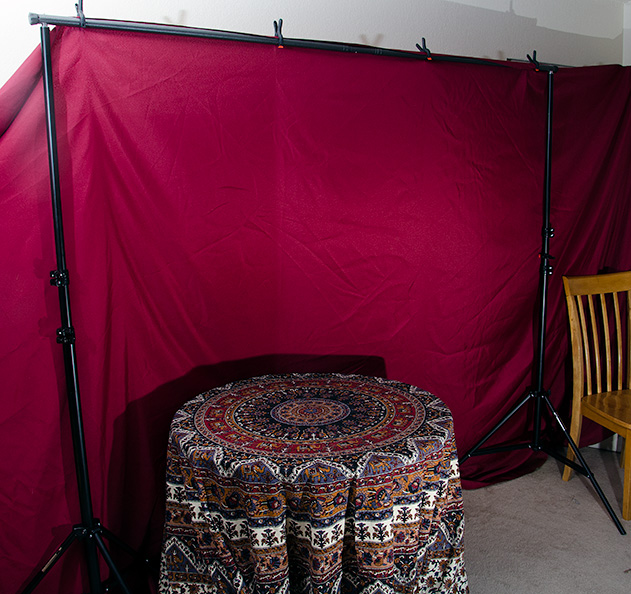 For backdrops I just use very large banquet style table cloths. They’re inexpensive, and easy to just throw in the washer/dryer for quick touch ups/wrinkle removal, if needed. I also like to keep on hand a few different ‘tapestry’ cloths and a bunch of different types of scarves, shawls, and table runners for placing around the photo subject in order to create different moods, seasons, or holidays.
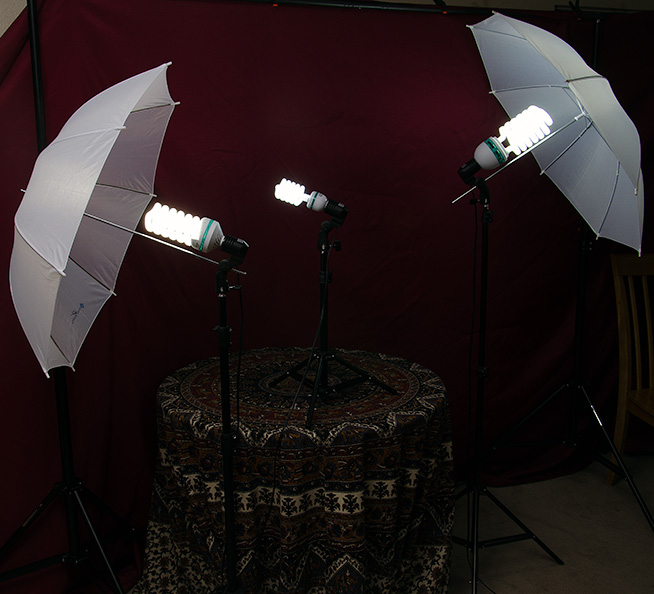
Next comes the lighting kits. I actually have two of these, the first is a ‘strobe kit‘ with two stands, four umbrellas (2 diffuser, 2 reflector), and two strobe/umbrella mounts that go on top of the stands.
 The second kit is a ‘continuous lighting’ kit that came with three stands, three light socket mounts, and three (very wimpy) CFL bulbs – I had to upgrade the original bulbs with these much heftier & brighter ones that actually work quite well for video (they’re still kinda wimpy for serious photography). In the pic below, the original (tiny) bulb is in the center stand.
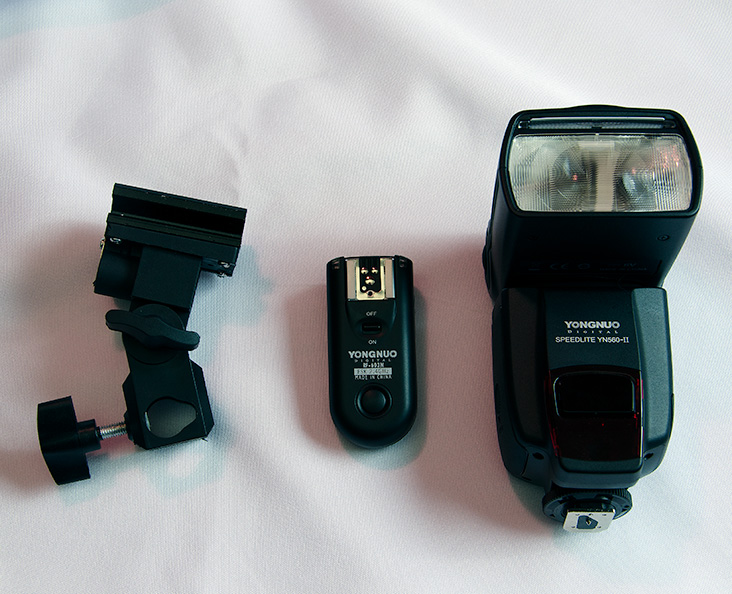
 The strobes and remote triggers I use are both by a brand I had never heard of before, Yongnuo, but they’ve been great so far. The triggers are kind of a pain to turn off/on though, since the body of the flash sets directly over the switch, so you have to remove the flash from the trigger in order to turn the trigger off/on. I bought two of the strobes and two of the trigger kits. You need two of the 2-trigger kits (for a total of four units) in order to have one mounted on the camera’s hot-shoe, plus two or three strobe receivers. I also purchased 3 extra ‘Hot Shoe’ mounts to use on the stands that I got in the ‘continuous lighting’ kit.
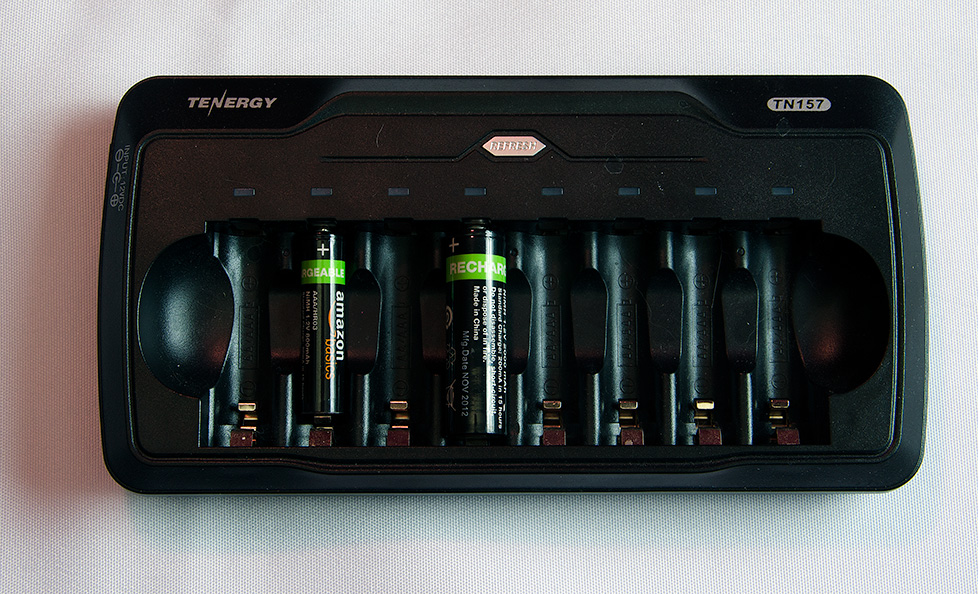
 To power all of the strobes and triggers I was originally using alkaline batteries. After a couple weekend of that I dropped that idea like a hot potato! I was only getting through one or two shoots (100-150 flashes) before having to reload the strobes with fresh batteries! So I bit the bullet and bought two full sets of rechargeable batteries and recharger, so I can have a set ‘in-strobe’ with another set ‘in-charger,’ as needed. That way I shouldn’t ever run out of power – and so far I haven’t had to buy another battery. I also bought a set of the AAA batts for the triggers – the pic below shows the recharger with one AA and one AAA installed.
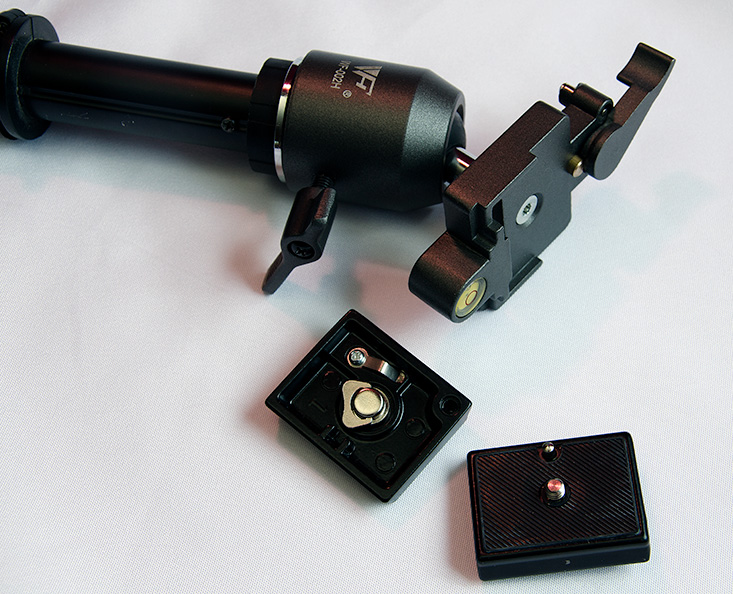
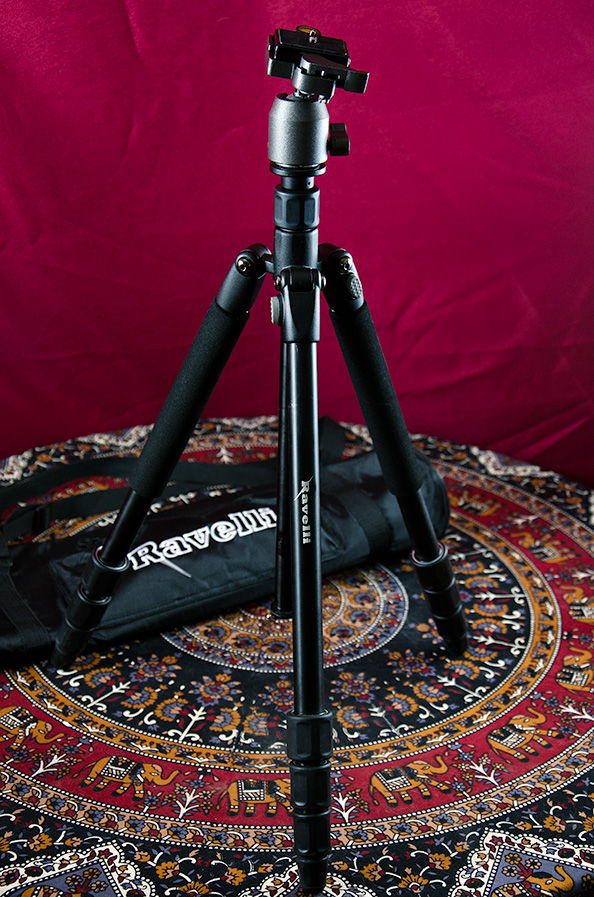
 For a tripod, I use a fairly inexpensive but sturdy Ravelli tripod that also has the option to change out the head. Which I did, I use a nicer Ball Head that has a great ‘quick release’ mechanism, as well as an ‘on board’ bubble level. In the below pic I have two of the ‘quick release’ shoes shown to illustrate the mount doesn’t require a coin to tighten into place, it actually has a little fold-away tab that you can turn to get the shoe mounted to the camera. I have two because I loved this head so much I bought another one to mount to my monopod! Which also makes it a breeze to interchange between the monopod and the tripod, or between my Nikon DSLR and my Canon video camera. The tripod also comes with a nice carrying case, which I use to transport my umbrellas in – it doesn’t zip all the way closed, but it works.
I transport my umbrellas in the Ravelli tripod bag, and I use a “Gator” bag (designed to hold speaker stands – think rock band speakers) to transport the backdrop stands, tripod, and my mono pod. Then I use the bag that came with my 3-stand ‘continuous lighting’ kit to transport all of my light-stands (shown behind the ‘Garor’ bag).
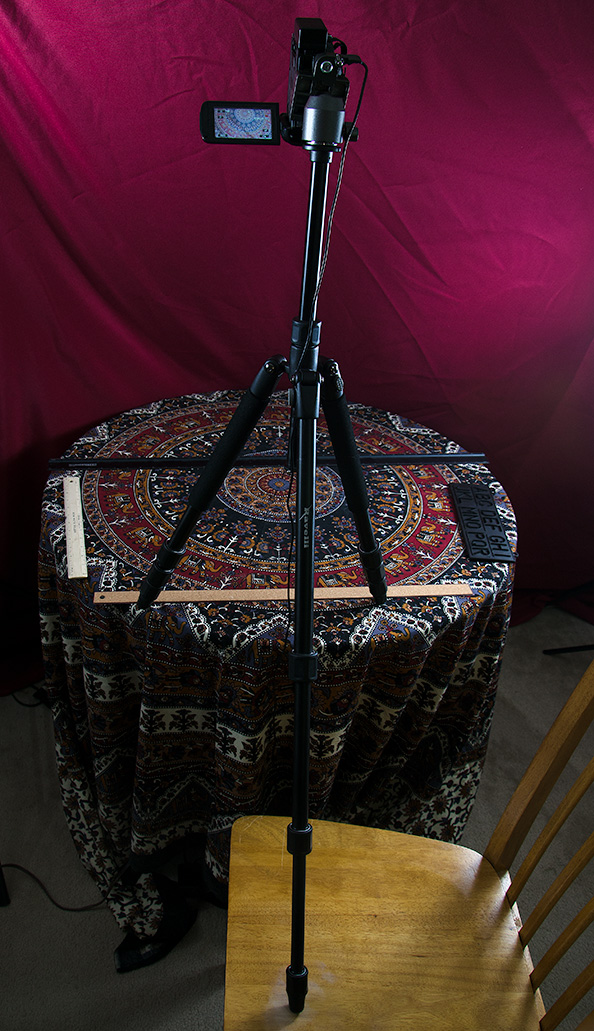
 OK – I think that’s it for my ‘portable studio.’ One last thing I was going to show is how I ‘mark out’ the area that is ‘live’ when I’m making a video. I simply place ‘straight edge’ markers along the edges as seen through the view-screen on the DigiCam – it’s very helpful in keeping your subject in (or out) of view, as needed:
 I hope you found this information helpful, and happy video/photo adventures! Enjoy!