Macro Photography; What is it?
First let me define the difference between Macro photography vs. Close-Up photography. Close-up photography is just that, up close to the subject of the photo. Sometimes this makes the subject appear larger than life on the final print or output medium. Macro photography is when the image of the subject is actually captured on the film or sensor at life size or greater than life size, which will always render the image larger than life on any print or final output medium that is larger than the film-frame or sensor area.
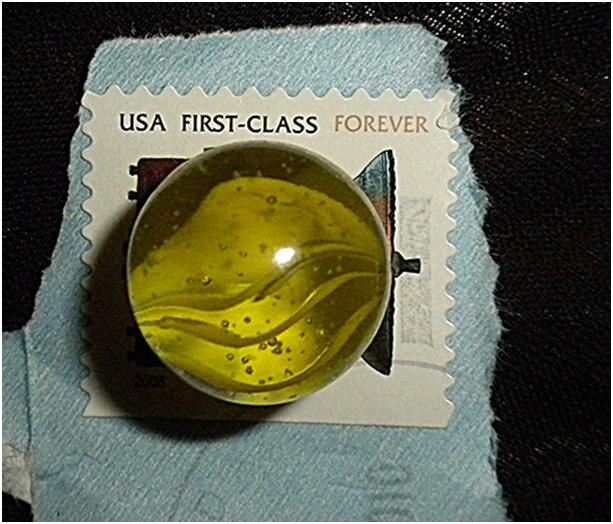
For example, in the above picture imagine the postage stamp is the image sensor of a digital camera. To be considered a ‘true macro’ image, the image of your subject needs to be projected upon that sensor at life-size or greater. So, in our example, the marble would very nearly fill the entire frame as a life size projection. So, on a 4″ x 6″ print, that marble’s image is going be very nearly 4″ in diameter since it nearly fills the sensor’s area of sensitivity.
So how do you capture your subject ‘life-size’ on the sensor? There are a few ways to accomplish this when using an SLR style camera:
- A Lens reversal ring which allows you to mount your lens backwards on the camera body
- A Lens coupling ring, where one lens is mounted backward onto the front of another lens mounted to the camera’s body.
- Close-up ‘filters’ that are simply magnifying lenses that screw into your lens’ filter threads
- Extension Tubes between the camera body and lens
- A special Macro Lens
Lens Reversal
A lens reversal ring lets you mount your lens backwards on the camera. By doing this you will lose all of the automatic features of the lens (like controlling aperture and focus). Most DSLRs control the aperture from settings on the body of the camera. In the ‘old days,’ a lens also had its own f-stop ring. If you have one of those old style lenses, you may want to use that as your main reversed lens, since it will be easier to manually adjust the f-stop. The aperture ‘work-around’ on newer style fully automatic lenses is to:
- Mount the lens normally
- Set the aperture to what you want
- Engage the ‘depth of field preview’ (dof) button
- Dismount the lens while the dof button is still being held
The biggest problem with this is that since the lens is now stopped down, what you see through the viewfinder will be much darker than you’re used to, and this can make it difficult to focus.
Lens Coupling
A lens coupling ring allows you to mount lenses ‘face-to-face.’ In effect this mounts a fairly strong magnifying ‘filter’ to the front of your mounted lens. A typical 50mm lens reverse-mounted to another lens in this manner grants a diopter of appx. +20 – much stronger than even the largest close-up lens filters, and with far less distortion.
Unfortunately I don’t have any pictures for this configuration. I’ve had a coupler on order for over a month and just was updated that it may be another month before it ships from Amazon. The initial delay was mentioned when I first ordered the item, so I’m not too surprised, I just wish it would have shown up in time for me to take some pics of/using this configuration.
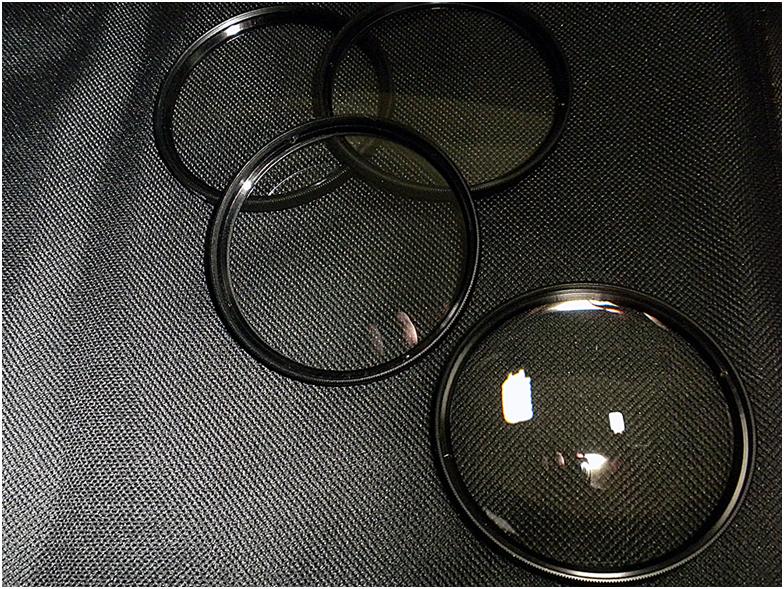
Close-Up ‘lenses’ [ that attach via filter threads ]
Close-up ‘lenses’ screw onto the front of your lens like a filter. They are simply like using a magnifying glass in front of your lens, albeit a bit more convenient since you don’t need to hold them with a free hand. They’re usually sold in set of 3 or 4 lenses with different magnification levels, typically; +1, +2, +4, and +10. They can be ‘stacked’ to obtain various levels of magnification. I almost never use this solution, since there are other techniques that render better results. However, they can be especially useful ‘in the field’ where you don’t want to be walking around with a reverse mounted lens, or you don’t have a dedicated macro lens at your disposal.
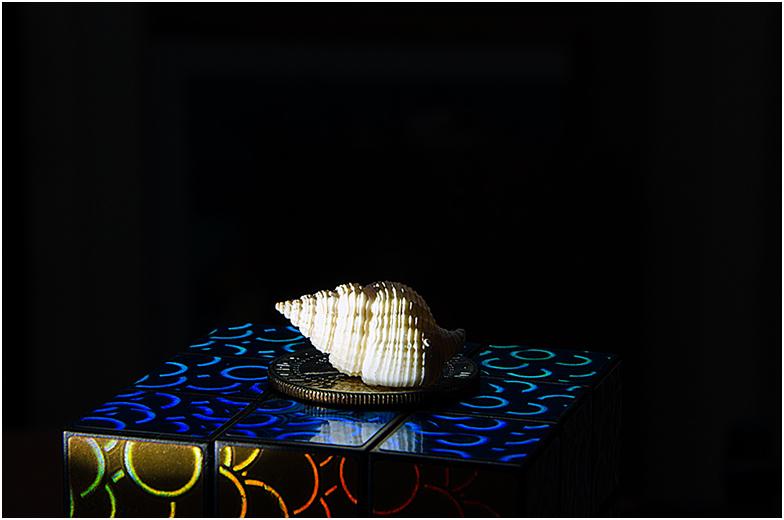
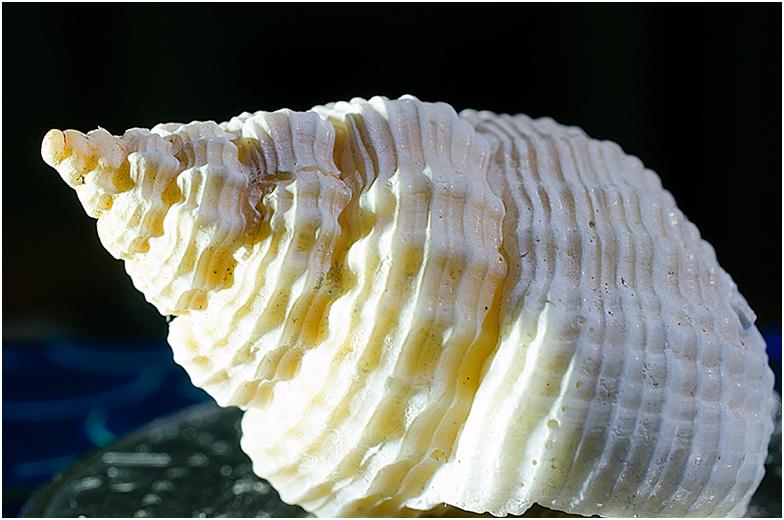
The following photo was taken with a plain 28-105mm Zoom lens, zoomed in to 105mm and focused as close as I could get the shell to the lens.
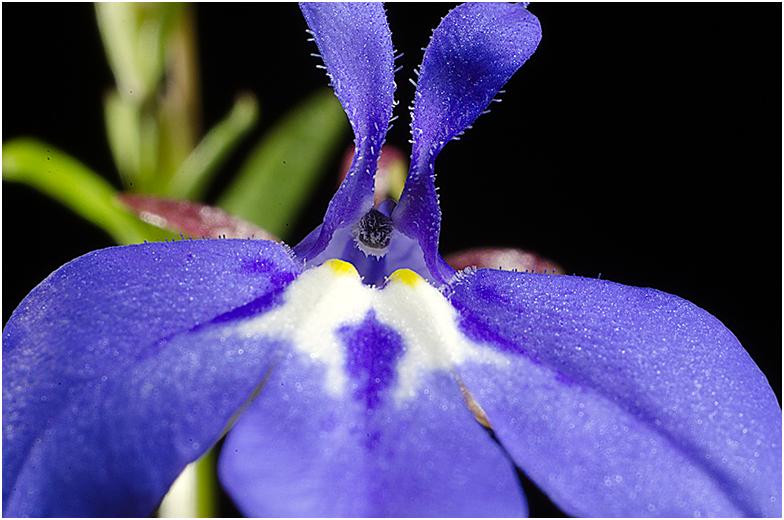
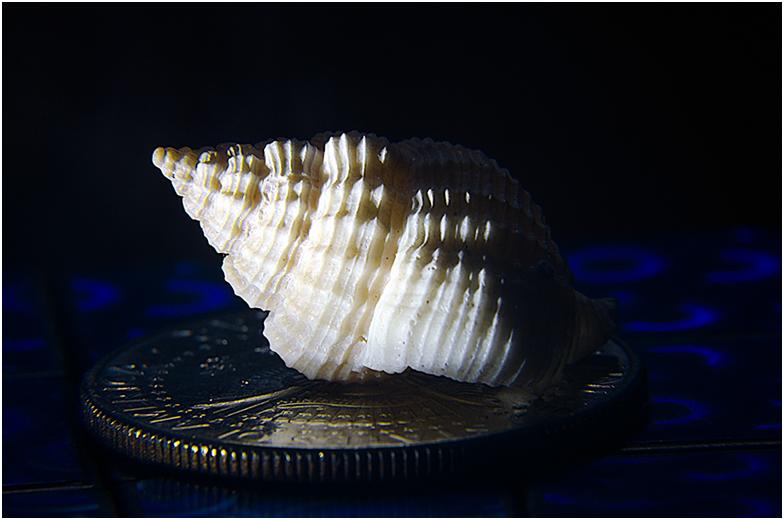
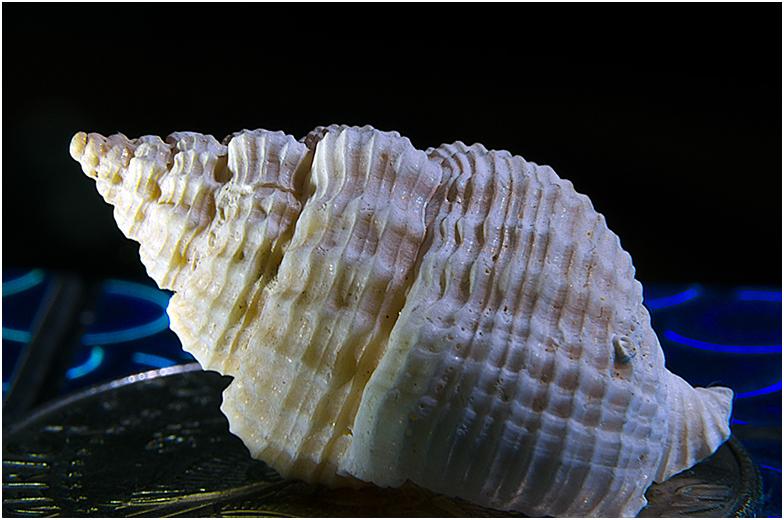
The photo below is taken with three of the macro ‘lenses’ stacked to create a +7 diopter (+4, +2, & +1) Note there is quite a bit of distortion, but it’s not visible in this reduced ‘web-sized’ image.
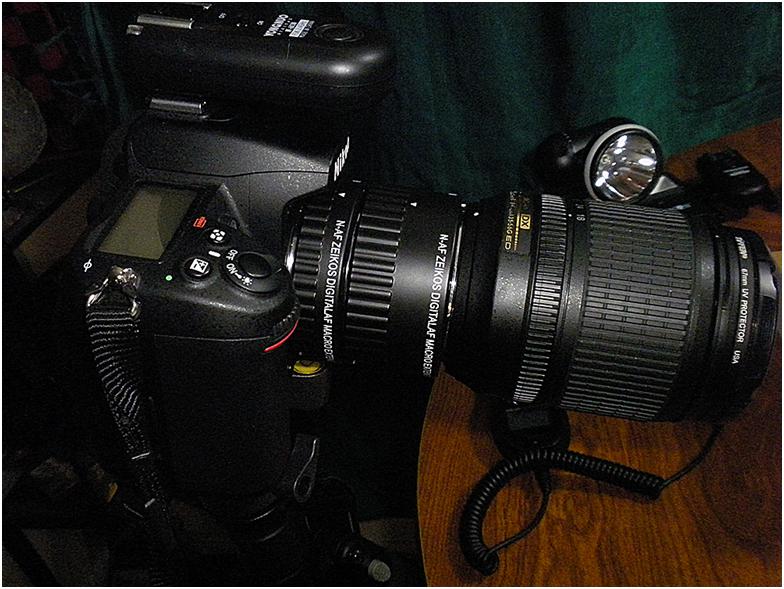
Extension Tubes
As the name implies, extension tubes are simply a tube that extends the distance between the camera body and the lens. The reason this works is because the further a lens is away from the focal plane (your sensor or film), the closer it can focus, and thus the better magnification. Even without an extension tube, a traditional lens’ closest focus is when the elements are pushed as far forward as possible. Extension tubes simply push the elements even further away from the focal plane. Traditionally, extension tubes are sold as a set of three tubes; small (7-13mm), medium (14-21mm), and large (28-36mm). They can be stacked for greater effect, but using too many can pull the lens-to-subject focal distance into the interior of the lens itself. Also, the more extensions used, the more light you will need to make the photograph.
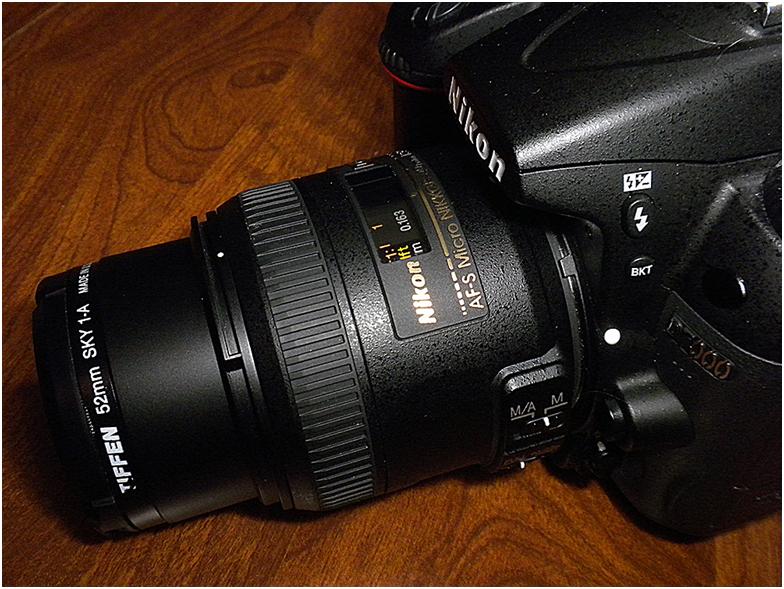
Dedicated Macro Lens
A true macro lens tends to render a very high quality macro image, since that is what the lens was designed to do in the first place. Macro lenses (‘Micro’ in Nikon-speak) have specially manufactured glass, use larger range of focus, and are tested to produce excellent focus at very close range. They typically reflect this by being significantly more expensive than ‘normal’ lenses. And, if the dedicated lens still isn’t getting you close enough, you can still use the above techniques in conjunction with your macro lens.
I hope you enjoyed this adventure into macro photography. If you’re interested in buying similar equipment, I tried to list everything over in my Amazon Store so you can quickly take a look at it and research whether you want to invest in it (it’s easiest just to click the item, and then click the ‘customer reviews’ link to see what other people think of the item(s). I’m hoping to do a two part YouTube video on this topic. Part One covering just the equipment is already done, hopefully I’ll have Part Two featuring the actual shoot this weekend. Happy photo-bugging, Enjoy!