Welcome to my Unity 3D Tutorial. I’m writing this to get folks up and running as quickly as possible with some of the simple things like setting up a project with all of the basic tools to create basic terrain, objects, lights, a skybox and some basic unityscript. Then we’ll work on some of the more esoteric topics like animated skyboxes (occlucding clouds) with day-night transitions, realistic terrain using height maps from GoogleEarth, and seamless transitions from scene-to-scene.
I’m also going to include how to extract and import assets from other games into your Unity environment. This is not legal to do if you’re going to market or distribute your game (even if it’s free). I include this information because most solo users do not have the time nor the training to build assets like these, and it’s also extremely valuable for such solo designers to see actual game objects and how they’re built. It also allows such soloists the tools to make quality ‘demo-reels’ to show prospective employers – just be sure to give credit where it’s due.
I’m using Unity 3D V.4 on 64-bit Windows 8, so that is the platform this tutorial assumes.
First things first – set up your new project
Open Unity 3D and from the “File” menu select “New Project.” You will want to make sure the path to where you want to store your project is correct – if not, simply browse to the proper parent folder. Once you’re there, in the empty part of the browsing window, right-click and create a New Folder. Name the new folder what you want to call your project. Project names in Unity are inherited from their folder name.
Now you will be asked which Unity components you want to import (you can import more later if you discover something missing.) I try not to pick too many from this list, esp. in the beginning, because it greatly impacts the project’s load time. The basics:
- Character Controller
- Light Cookies
- Scripts
- Terrain Assets
- Water (Basic)
Remember you can always import more assets later if you discover you need them. Once the project is open, I like to set up my layout to the “Wide” setting. This can be done by clicking on the “Layout” button at the far top-right area of the window. You can look through the other layouts to see if any of those suit your style better. Also, I don’t like the default verbosity of the “Project” pane, so I right click in the empty portion of the title tab and change it to “One Column Layout.”
Terrain
Usually the first thing you create is your terrain. To do this:
- Use the “GameObject” menu
- Select “Create Other”
- And from the submenu select “Terrain”
Now you should have “Terrain” listed and highlighted in your “Hierarchy” pane, and some information should also be displayed in the “Inspector” pane.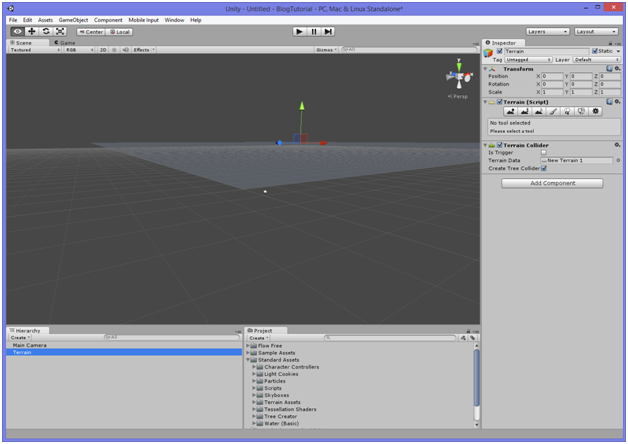
Now we need to adjust some of the default settings to re-size the terrain and to allow for “under-water” areas by placing the plane above zero. These settings are found in the “Inspector” plane by clicking on the black “gear” button at the far right of the button bar under the “Terrain (Script)” section:

The settings we’re looking for are down in the “Resolution” section. A good size for experimenting with is 600 (meters) Length, Width & Height: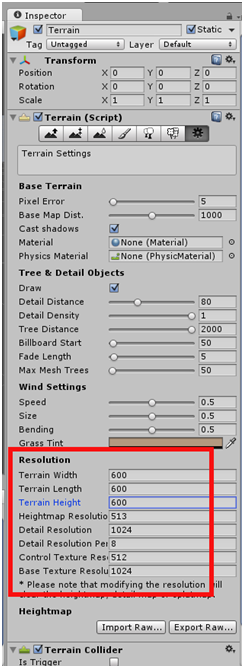
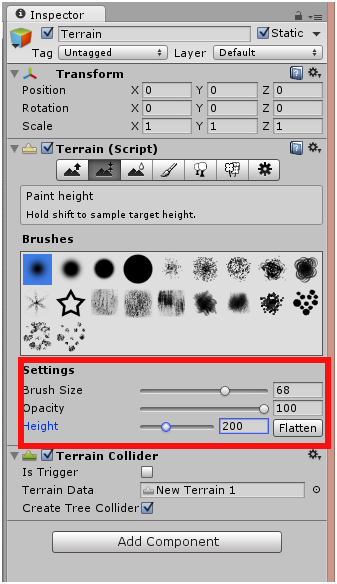
Next, we need to raise the entire terrain plane so we can build both UP and Down. To do this we use the “Paint Height” button:

Under “Settings” set the Height to 200. Since our overall terrain height is 600, this will allow us to have “oceans” (or underground structures) up to 200 meters down and “mountains” up to 400 meters tall. You MUST hit the “Flatten” button for this setting to take effect.
In the following image, I’ve used the above settings and created a pinnacle 400 meters tall (the max. height) and a hole 200 meters deep (the max depth). Then I changed the Height to 250 (DO NOT hit “Flatten” at this point, or it will “erase” (reset) the entire terrain to a height of 200) and painted the “butte” behind the pinnacle so it would be exactly 50 meters (200+50) higher than the ground level: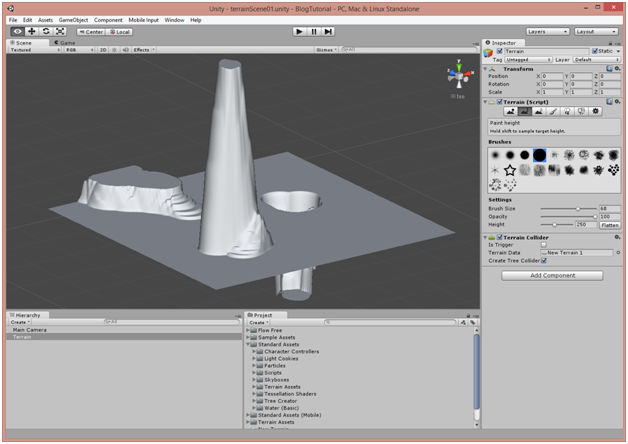
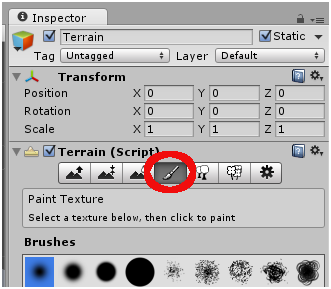
Since the previous image is not what I want my terraing to look like, I’m going to go ahead and “Flatten” the image and apply my first texture. To apply a texture to the terrain you click the “Paint Texture” button:
Then click the “Edit Textures…” button:

This will bring up the texture selection window:
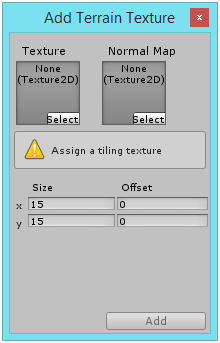
Under the “Texture” heading, click the very small “Select” button to bring up a list of available textures:
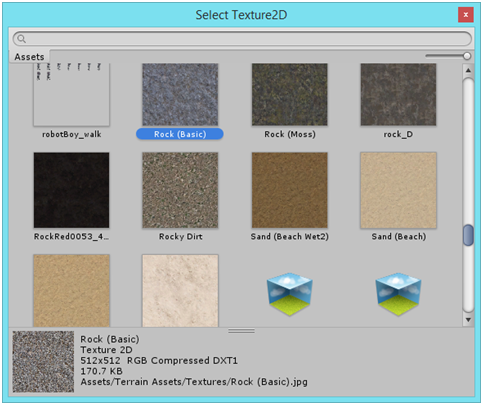
After picking a texture, click the “Add” button to apply the base texture to your terrain. If you can’t see your terrain, you may need to pan around your scene. You can do this using a few techniques:
- Holding the right mouse button allows you to pan the view (like turning a camera around on a tripod)
- Holding the middle mouse button down allows you to drag the view (like moving a camera tripod to a different location)
- If you have a middle-scroll wheel, you can use that to zoom in/out.
Once you have your texture apply, it’s time to build some terrain (hills, gullies, mountains, etc). Click the “Raise / Lower Terrain” button: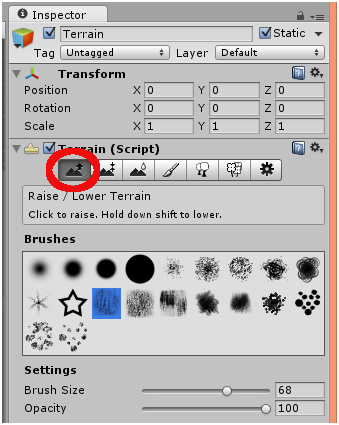
You can use the various brushes to “paint” the terrain. Left-click and drag over the terrain plane to build UP (all strokes are additive, the more you paint, the higher the terrain gets). If you want to create a valley, shift-left-click & drag to build DOWN. Remember if your terrain gets totally out of control, you can always go to the “Paint Height” section (outlined earlier) and click the “Flatten” button to “erase” everything and start over.
Often the first pass of terrain painting is very harsh. To smooth out the terrain and make it look more realistic, use the “Smooth Height” tools: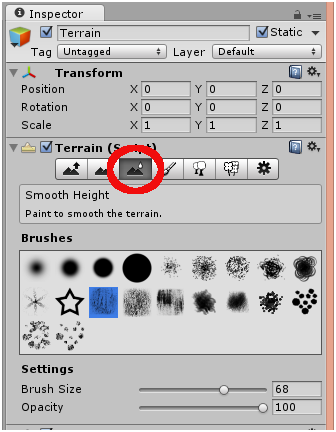
The brushes and mouse buttons in this tool behave the same as terrain painting, but instead of harsh up-down creation, the brushes just smooth out the terrain. Building a good looking terrain takes a lot of experimentation, so feel free to play with several of these tools and flattening the terrain to start over with a blank canvas when you’re comfortable enough to build a realistic terrain.
Once you get a working terrain, you’ll want to add a directional light (a light that casts shadows). The directional light acts like a Sun in your scene. To add one, use the “GameObject” menu, select “Create Other” and finally select “Directional Light.” To bring the light into the view so you can adjust it easily, make sure the Directional Light is highlighted in the “Hierarchy” tab and then from the “GameObject” menu select “Move To View.” This will move the light into your view so you can adjust it. To change the angle/direction of the light, select the “Rotate” button from the top-left set of buttons and use the circular “handles” to rotate the lamp on its various axes. 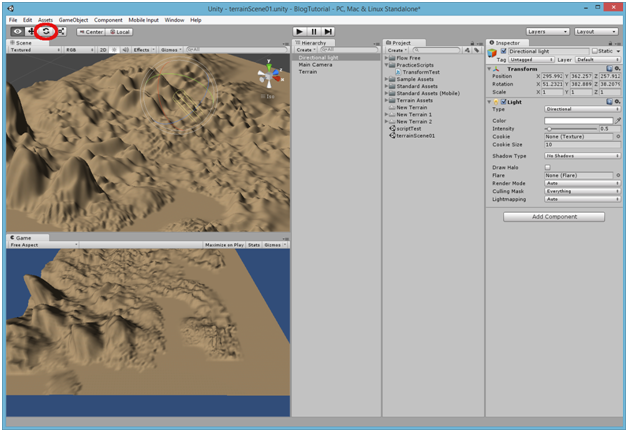
Wish you have time to continue your the video “companion guide” for Grand Lenormand cards.
Thanks
Hi Hymn,
I’ll try – I had to break down my video area over the holidays and I haven’t set it back up yet (I have seedlings there now due to “Spring Fever”). I’ll probably start working on the videos again late April. Thanks for your interest 🙂